HTTP Requests
Connectors are the building blocks of your Workflow and allow you to connect to third-party applications and services. If you want to send data to an application that doesn't have a built-in connector, you can use the generic HTTP Connector to make HTTP requests to that application's API.
Tip: Use raw request actions for built-in connectors
If you are integrating with an application that has a built-in connector, but you need to access an endpoint that does not have a dedicated action, you can generally use the connector's "Raw Request" action to send an authenticated request to that application. Most built-in connectors contain a "Raw Request" action, like Slack, Hubspot, etc.
HTTP verbs
HTTP requests can use different HTTP verbs to indicate the type of action being performed. The most common verbs are:
GET: Retrieve data from the server.POST: Send data to the server, often creating a new resource.PUT: Update an existing resource on the server.PATCH: Partially update an existing resource on the server.DELETE: Remove a resource from the server.
Generally, you will use GET for retrieving data and POST for sending data to an API. However, the specific verb you use will depend on the API's design and the action you want to perform.
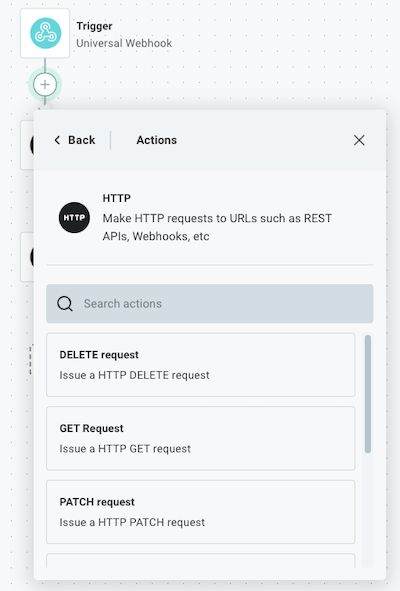
To add an HTTP request to your workflow, search for the HTTP connector and then select the HTTP verb you want to use.
Authenticating HTTP requests
The HTTP connector supports several authentication methods to securely connect to APIs (like OAuth 2.0, API key bearer token, basic auth, etc). If you click + Add connection to your HTTP request step, you can select the authentication method you want to use.
If the API you're connecting to requires custom authentication (for example, it requires an x-acme-api-key header), you can provide that authentication header as a Header input - specify the name of the header as the Key, and your API key as the Value.
Sending data to an API using the HTTP connector
Some HTTP verbs (POST, PUT, PATCH) allow you to send a request body to an API, which is often required when creating or updating resources.
The HTTP connector supports sending data in various formats, including JSON, XML, form data, and GraphQL requests. Below are examples of how to send data in these formats.
Sending JSON data
JSON (JavaScript Object Notation) is the most widely used data format for interacting with APIs. To send JSON data in an HTTP request, first generate a JavaScript or JSON payload in a previous step. If you are adept at coding, you can use the Code connector to generate a JavaScript object.
Tip: Create objects using the Collection Tools connector
The Create Object action is a great way to create a JSON object from scratch.
Feed the results of your previous step into the Body input of your HTTP request step.
If your previous step returned a JavaScript object, you can reference it directly in the Body input.
The action will automatically include the necessary Content-Type: application/json header for you.
If your previous step returned a serialized JSON string, you can pass that string directly into the Body input.
Be sure to set the Content-Type header to application/json in the Header input, as the connector will not assume the stringified body is JSON by default.
Sending non-JSON data
If you need to send data in another stringified format, like XML or CSV, you can do so by passing the stringified data into the Body input of your HTTP request step.
Make sure to set the Content-Type header to the appropriate value for the format you are sending (e.g., application/xml for XML data).
Sending form data
Form data is often used when submitting HTML forms or when an API expects data in a key-value format.
It's especially helpful when sending multiple fields or files in a single request.
For example, you can post a form with text fields and file uploads in a single request using the multipart/form-data content type.
To send form data in an HTTP request, select the POST/PUT Form Data Request action. If you are sending multiple text fields, you can send them using the Form Data input. If you are sending one or more files within the request, you can use the File Data input to specify the content of the files you want to upload, and the File Data File Names input to specify the names of the files being uploaded.
For example, you may give the File Data input a key of myFile and value of Hello, World!.
Then, in the File Data File Names input, you would specify a key of myFile and value of myFile.txt.
That would add a file named myFile.txt with the content Hello, World! to the form data request.
Sending GraphQL requests
While GraphQL requests are, at their core, HTTP POST requests of JSON data, it's often helpful to serialize the GraphQL query and variables automatically. Use the generic GraphQL connector to send GraphQL requests as you would HTTP requests.
Your query can contain GraphQL variables, which are passed in the Variables input.
For example, if you have a GraphQL query that looks like this:
query getUser($myId: ID!) {
  user(id: $myId) {
    id
    name
    email
  }
}
You can specify a Variable input with a key of myId (without the $) and a value to be substituted into the query.
HTTP headers
The API you connect to may require specific HTTP headers to be included in your request. You can add these headers in the Header input of your HTTP request step.
Common headers include:
Authorization: Used for authentication, such as a bearer token or API key.Content-Type: Specifies the media type of the resource being sent (e.g.,application/json,application/xml, etc.). The HTTP connector defaults toapplication/x-www-form-urlencodedunless a JavaScript data body is provided, in which case it defaults toapplication/json.Accept: Indicates the media type(s) that the client is willing to receive from the server (e.g.,application/json,application/xml, etc.). The HTTP connector defaults to"application/json, text/plain, */*"User-Agent: Identifies the client software making the request. By default the HTTP connector sendsaxios/{version}, but this can be overridden as necessary.
Query parameters
Query parameters are often used in GET requests to filter or modify the data being retrieved (though they can be used by other HTTP verbs as well).
They're the key-value pairs appended to the URL after a ?, like this: https://api.example.com/data?key1=value1&key2=value2.
You can add query parameters to your HTTP request by using the Query Parameter input.
HTTP responses
Like an HTTP request, an API can respond with different types of data. The HTTP connector can handle various response formats, including JSON, XML, plain text, and binary files.
JSON responses
If you expect a JSON response, select JSON as the Response Type in your HTTP request step. The HTTP step will automatically parse the JSON response and make it available in the result of the step.
Other text responses
If you expect a different text-based response type (like XML or CSV), select Text as the Response Type and then feed the result of the step into an action like Deserialize XML or Deserialize CSV to parse the response.
Binary file responses
If you expect a binary file response (like an image or PDF), select Binary File as the Response Type. Behind the scenes, the HTTP connector will download the file and return the file's contents as a JavaScript array buffer, formatted like this:
{
  "data": <ArrayBuffer>,
  "contentType": "image/png",
}
You can pass the results of the HTTP request step into any other input that expects a file, like an SFTP Write File or Salesforce Add Attachment step.