Getting Started
Overview
This tutorial will walk you through some basic concepts of Workflow development using the Acme Inc's Workflow Builder.
- Fetch user data from an API
- Learn how data flows between steps of a Workflow
- Use a loop to iterate over the users you fetch
- Use logical branches to make decisions based on user properties
- Take different actions based on user characteristics
Workflow overview
The Workflow you build here will fetch a list of users from an API, loop over each user, check if they're from a specific geographic region (south or north of the equator), and take different actions based on their location.
We'll use the JSONPlaceholder API https://jsonplaceholder.typicode.com/users, which provides sample user data.
Start building
We'll start by creating a new Workflow. Log in to Widget ERP, then navigate to integrations > workflows and click on 'manage workflows'.
Create a new Workflow by clicking + Workflow.
Configure the Workflow trigger
This Workflow will run on a schedule. When prompted, select Schedule under select your trigger and then configure your Workflow to run on a daily basis at a time of your choosing.
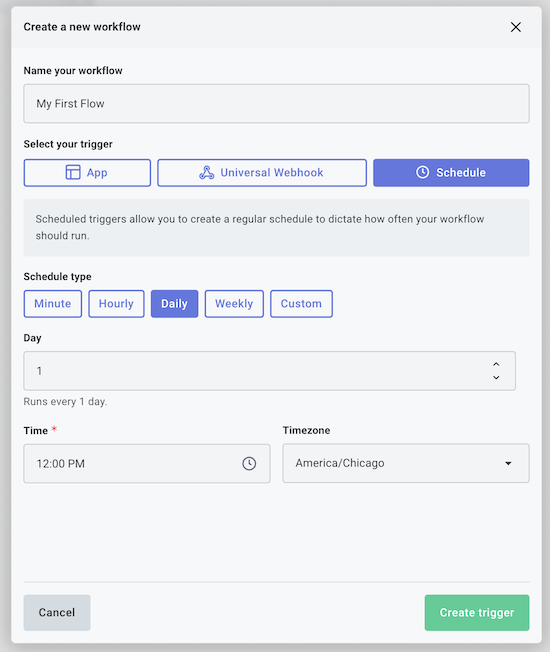
Note: Your schedule trigger will be active once you finish building and enable your Workflow. For now, you can test your workflow as you build it by clicking the Run button at the bottom left of the canvas.
Fetch user data from an API
Next, add a new step to your Workflow by clicking the + button below your trigger. Search for the HTTP connector and add a GET Request step.
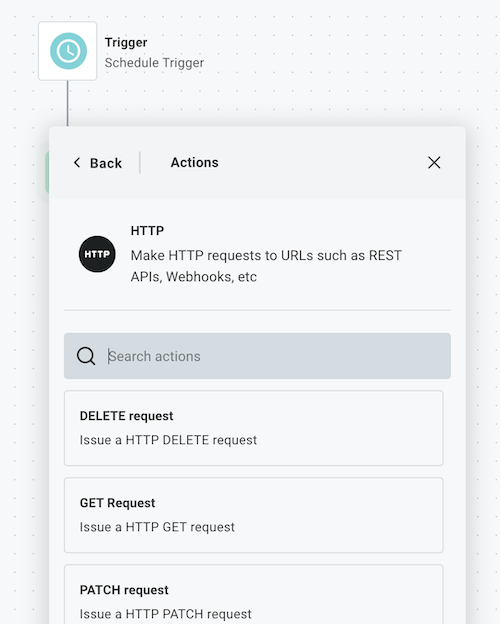
Rename the step to Get Users.
Configure your step to fetch user data from the JSONPlaceholder API.
JSONPlaceholder does not require authentication, so no connection is required.
In the URL field, enter: https://jsonplaceholder.typicode.com/users

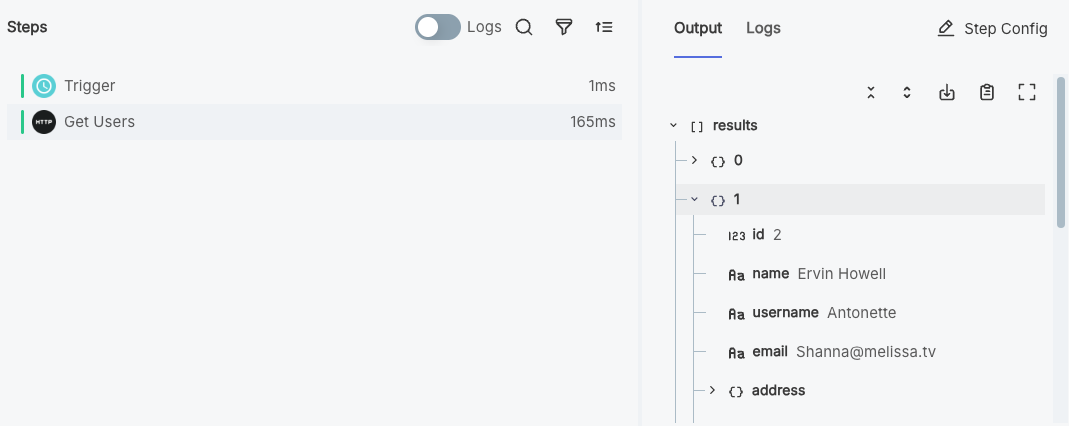
Click the green Test button to test your Workflow so far. If you select the Get Users step in your test results, you will see the user data that was fetched from the API in the Output tab.
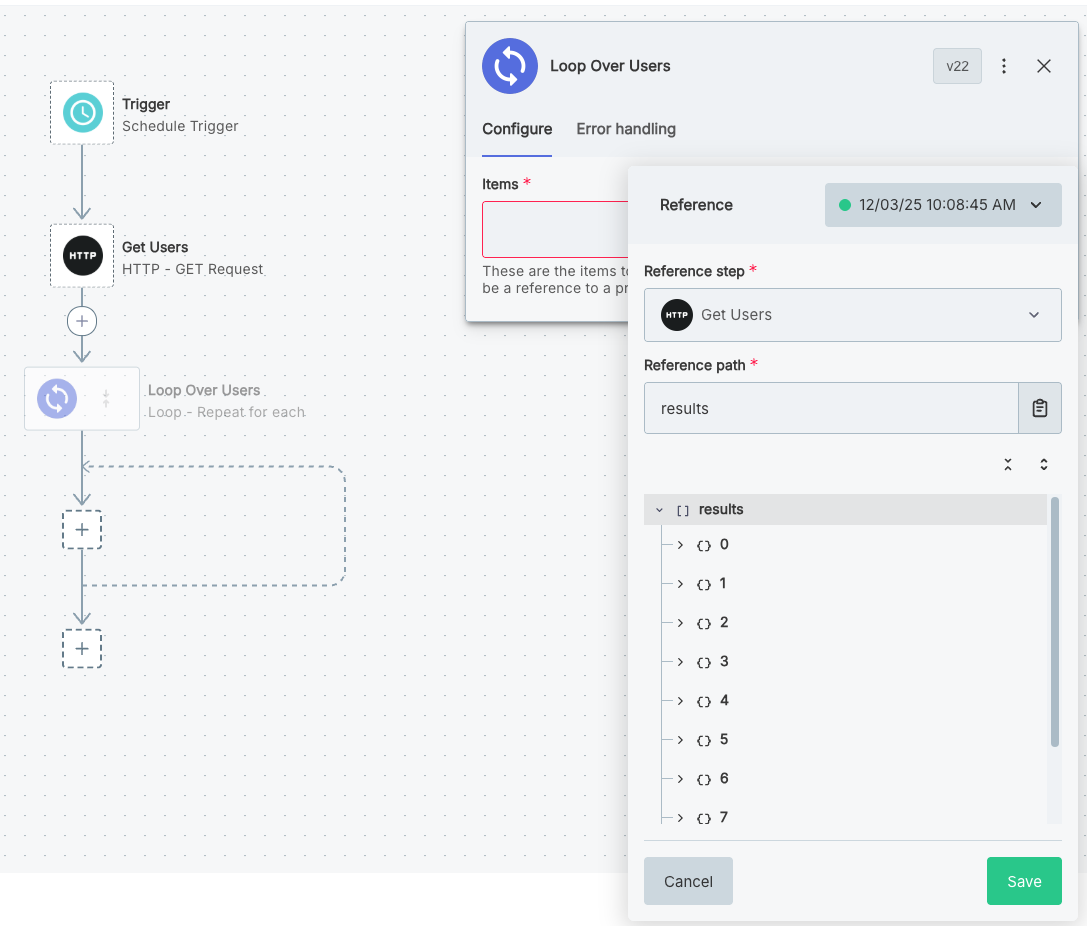
Loop over the users
Now that we're fetching a list of users, we need to loop over each user to process their information. Add another step under your Get Users step, this time searching for the Loop > Repeat for Each action.
Name your step Loop Over Users.
Configure your loop step to iterate over the user data from the previous step.
In the Items field, click Configure Reference and select the data property (or body property) of the Get Users step.
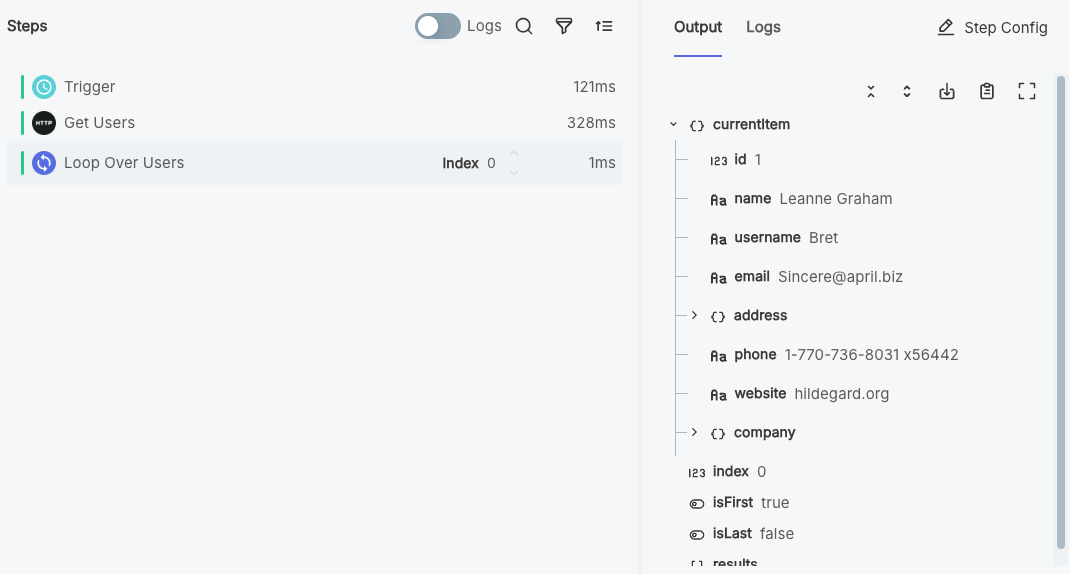
Run a test of your Workflow again. This time, you'll see that the loop step has a currentItem property in its output that contains the data for the current user being processed. We'll use this property in the next step to check the user's location.
Branch based on user's location
Now that we're looping over each user, we need to check their address to see if they're from a specific region.
Looking at the user data, each user has an address object with a geo property containing latitude and longitude coordinates.
We'll use the latitude to determine if they live south of the equator (latitude < 0).
Add a step within your loop, this time selecting Branch > If Condition is Met. Name the step Check User Location.
Configure the branch step to have a condition called Is Southern User?.
In the Field input, click Configure Reference and select the loop step's currentItem.address.geo.lat property.
Under Operator select is less than.
In the Value field, enter 0.

Now, users with latitude less than 0 (southern hemisphere) will follow the Is Southern User? branch, while users from the northern hemisphere will follow the Else branch.
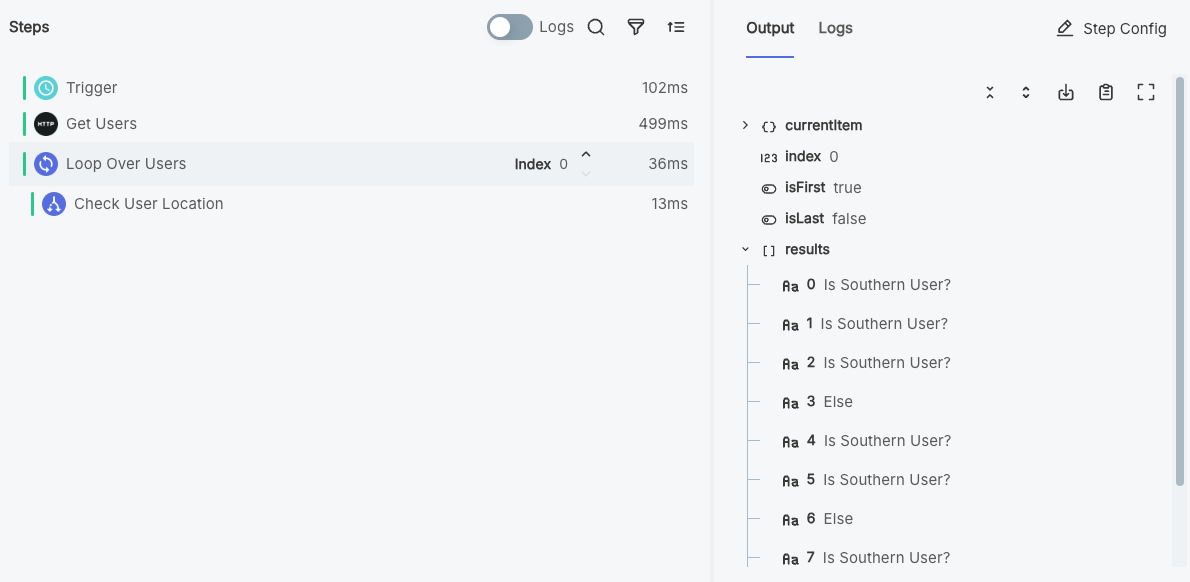
If we run our Workflow once more and look at our Loop Over Users step again, we can see that the branch step followed the Is Southern User? branch for the first three items, then the Else branch once, etc.
Handle users in each branch
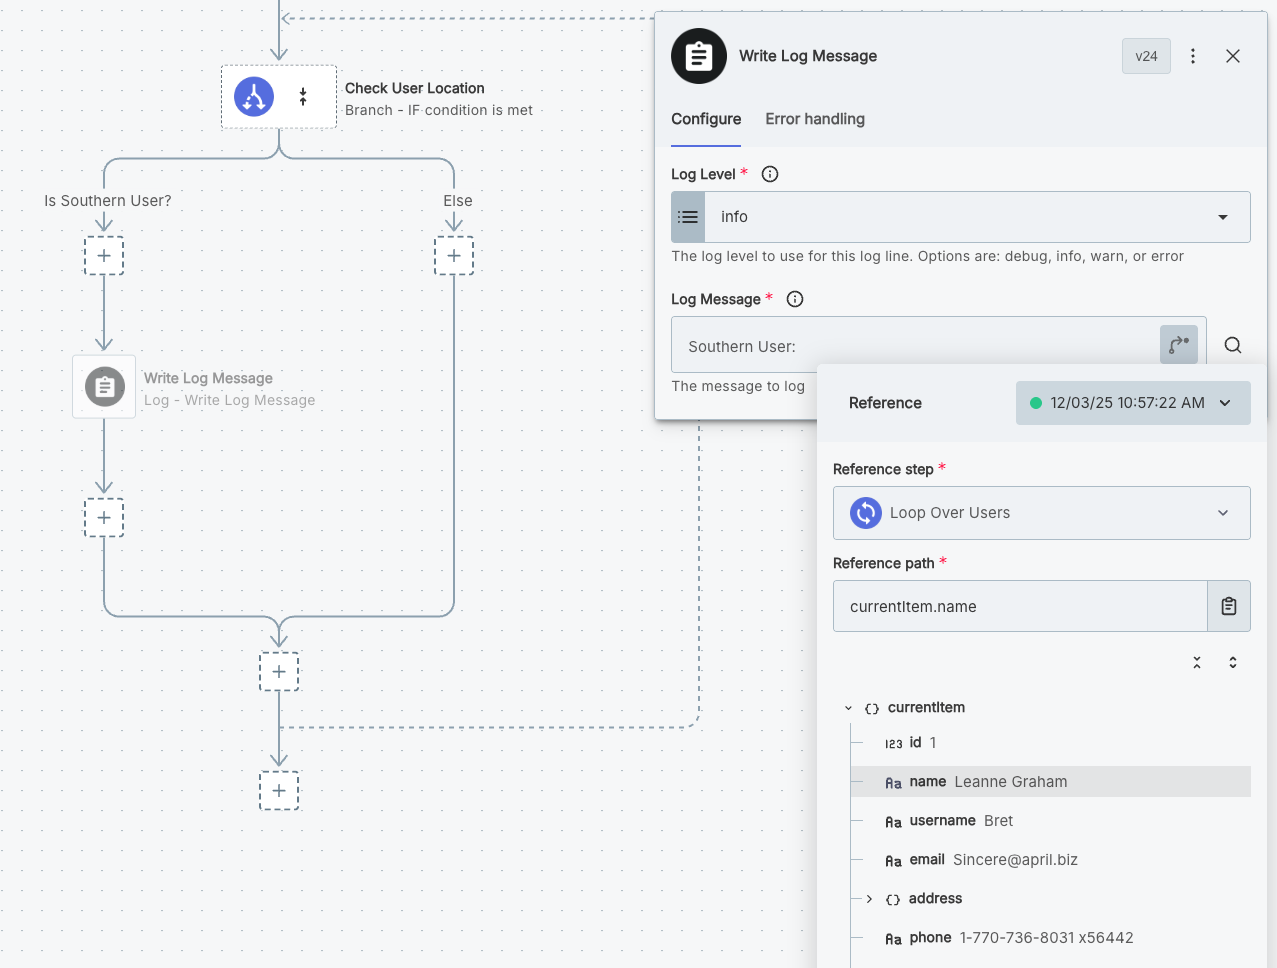
Under the Is Southern User? branch, add a log step.
Create a friendly log message announcing the user by name.
You can reference the user's name from the loop step's currentItem.name.
Add a similar log step to your Else branch.
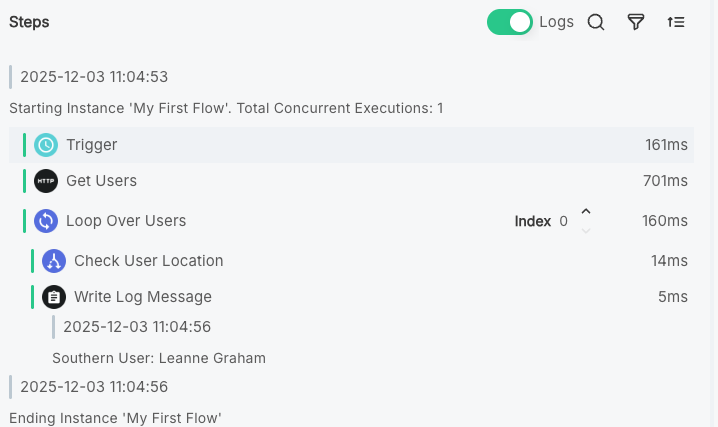
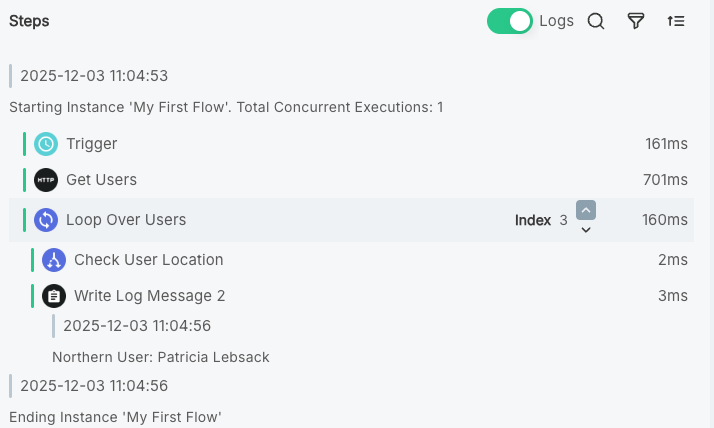
If you toggle Logs on in the test runner drawer and increment the Index of your loop step, you can view the log message that each loop iteration yielded.
Next steps
Congratulations! You created your first Workflow! While a little contrived, this Workflow demonstrates how to fetch data from a third party, loop over lists of records, and use branching logic.
Here are a few things you should try next:
- Modify the branching logic: Try branching on different user properties like company name, email domain, or website.
- Add external actions: Instead of just logging, send emails to users, create records in a database, or post to a chat system like Slack.
- Add more complex processing: Parse user data and validate email formats using a code step, or enrich user information with additional API calls.
- Add error handling: Use step-level error handling to handle potential errors gracefully.